Starting a garden can be fun, simple and a fantastic creative venture. There are so many benefits to growing a garden, and so many different types of gardens you could create. Even if you don’t have a yard, you could still start a potted garden on your porch or patio. Possibilities are endless when it comes to growing some plants. And in this post, I am going to share with you a simple approach to getting started today.
Before you begin, figure out your “WHY.”
Before starting anything, it is really important to think about why it is you want to do it. What are your goals? What do you want to get out of this? Do you just want to beautify your space? Do you want to create more of a space to connect back to nature? Do you want to grow some food to alleviate some of the grocery bill? Do you want to be more self sufficient? Do you want to help support the much needed pollinator insect population? Do you want better rain water infiltration in your yard?
There are so many reasons why someone may want to start a garden, so give some thought to yours. Once you do that, then you will be in a better position to start planning the garden. You will have a better idea as to what plants you will choose, where you will design the garden…etc.
12 steps to starting your own garden:
- Evaluate the space and environment. Before you start designing, it is important to really survey the space and find the best location for your garden. Where do you get the most sunlight? Where do you see weeds and grass growing really well already? Do you need to utilize potted plants instead? What is your water situation like? Put some thought into the space you are working with before you begin.
- Create a strong, solid foundation. Healthy soil is the cornerstone for healthy, nutritious plants and crops. Before you begin designing or planting anything, it is crucial that you check out the condition of the soil that you currently have. Some simple things you can do to check to see if your soil is in good condition are the squeeze test, the percolation test and the worm test. For the squeeze test, all you have to do is dig up a bit of soil in the area you think you will be preparing the garden in, add a bit of water, then squeeze a handful in your hand. Once you release your grip, does the soil fall apart? does it hold its shape? Or is it something in between? If its something in between, then you are in great shape. For the percolation test, you simply just need to dig a fairly deep hole in the ground where you plan to start your garden and then pour a bunch of water into it. If the water gets absorbed into the soil fairly quickly, then it may be sandy. If it sits there for many, many hours, then it may have too much clay. If it disappears within less than an hour, then you are in great shape. And finally, the worm test is the easiest of them all. Just dig around in the area you have selected and see if you find any earthworms! If you find a bunch, then you are in GREAT shape. If you don’t find any, then you will need to build up your soil. (If you are doing a potted garden, then you don’t need to worry about this step since you will be using soil bought from a store)
- Prepare the soil and make amendments if needed. Normally I am an advocate for the “no-dig” method of gardening, but you can till up the grass and the soil when first installing your garden and it will actually increase the fertility as well. Over time, though, I recommend continually building up the soil and minimizing the disturbance of soil life. If your soil has too much clay content, or is too sandy, or doesn’t have many worms, then you may want to make amendments to it before putting plants in the ground. The best way to increase fertility and organic matter (which helps bring in worms and increases water holding capacity) is to add compost. You can buy a few bags from your local nursery or greenhouse, or even start composting at home to minimize your trash and make the most out of your food scraps and plant waste. If you want to go all out, you could do a pH test as well and see if you need to increase or decrease your soil pH.
- Make a list of the plants you want in your garden, and do a bit of research on them. One of the best things I’ve learned about gardening is that the more knowledge I have on the plants I am caring for, the better I can care for them. In general, most plants need three basic things in order to thrive: sunlight, water, and healthy soil. But there are some nuances to consider for some specific plants. For example, cranberry and blueberry plants do best in slightly acidic soils. Also, some plants thrive in cooler, less sunny environments such as the brassicas, ferns and hostas. And you also will know crucial information like how big the plants can get, how much space they need to grow, and how long they take to mature.
- Design your garden on paper. You don’t need to be a brilliant artist to draw out your design. It’s just a practical way to plan everything out and really know where and how you want everything. Here are some examples of my drawings (be aware that I have a background in art and design):
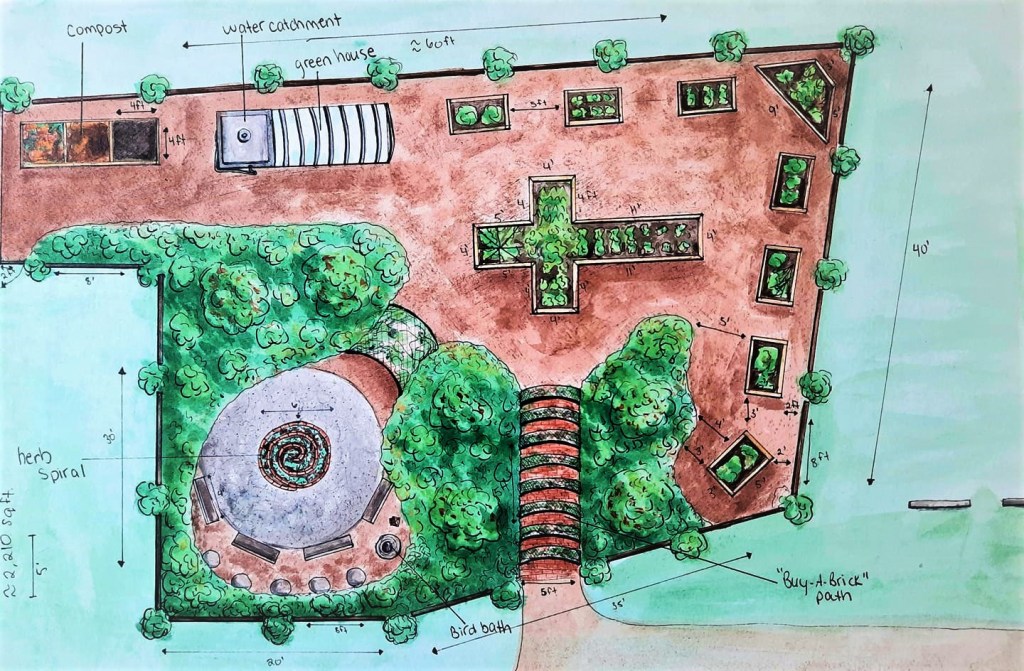
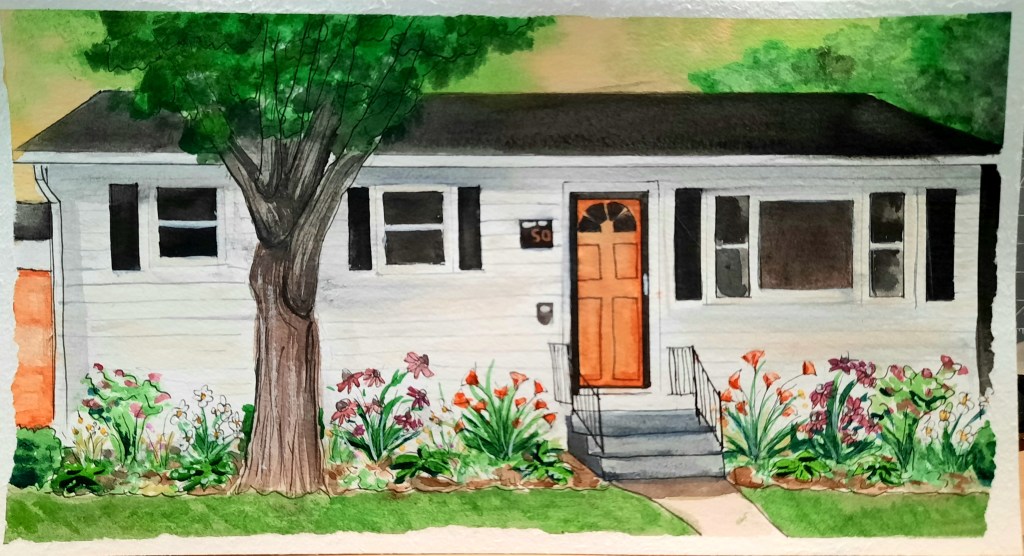
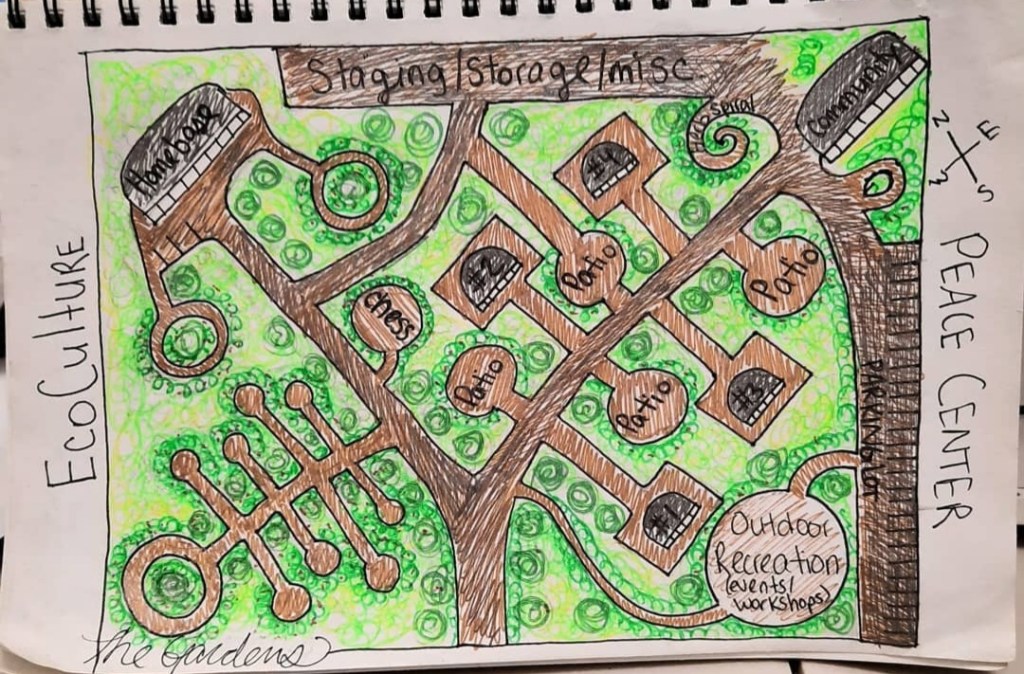

Your design can be as detailed as you want, or as simple as you want. It doesn’t have to be perfectly to scale, so long as you have a rough idea as to how much space you will have for everything. If you would like some help designing your garden, please feel free to sign up for a consultation!
6. Make sure you have all the tools you need to make the process easier. Work smarter, not harder. Gardening doesn’t have to be back breaking. With the proper tools, you and your back will be in some pretty good shape. Here are some of the tools that will make your gardening journey a heck of a lot easier:
- A action weed hoe is a must! The long handle and the functional design makes weeding SO much easier, efficient and less strenuous.
- Get a few different types of rakes. These rakes are great for spreading the soil or mulch around. These adjustable rakes are great for collecting the weeds you pulled up with the hoe. This rake is great for leaves and other plant debris on your lawn. And finally, you could also get this ergonomically designed pick-up rake.
- Of course, you will also need some spades and shovels. This shovel is great for digging the larger holes. For smaller holes you can use a trowel like this one. Another great multi-use cultivator tool would be this hand tool.
- Gardening gloves would also be a great investment. They will protect your hands from thorns, insects, getting your hands dirty and much more.
- A wheel barrow or wagon to transport supplies, plants, soil or mulch to and from the garden.
- A hand held cultivator can be used to till the area when first installing your garden.
- An edger can be used to help you clearly distinguish where the garden begins and the lawn ends.
- And finally, a set of pruners and shears will come in handy when it comes time to maintian your beautiful garden.
7. Now that you have found the perfect location for your garden, you have evaluated and amended your soil, you have figured out what plants you will be growing and learned how to care for them, designed your garden, and have your tools ready to go, it’s time to start getting dirty and install your garden. I would first use an edger to line out the exact perimeter of the garden and make clean cuts along the lawn. Gives it a cleaner look as well. I also recommend shopping at your local nursery or greenhouse to purchase your plants, as it supports your local community and economy.
You can start them from seed as well, but it does take a lot more effort and time on your end. If you want to start them from seeds, I would give yourself about 2 months in advance before beginning the installation so they have time to grow in some pots and mature before going into the ground. (and be sure to check the seed packets to know proper germination requirements and how long they will take to mature.) BUT, if you buy your plants from a nursery, then all of that work has already been done for you!
8. Before you start digging holes, I would lay out all the plants in the spots you planned to get a really good visual of the garden. You still have the freedom to move things around and change things up if you so choose. Once you are 100% satisfied with the placements, then gear up and let the shoveling commence.
9. When you are taking your plants out of the pots and into the hole in the ground, be sure to check the roots. If they look “pot-bound” like this:
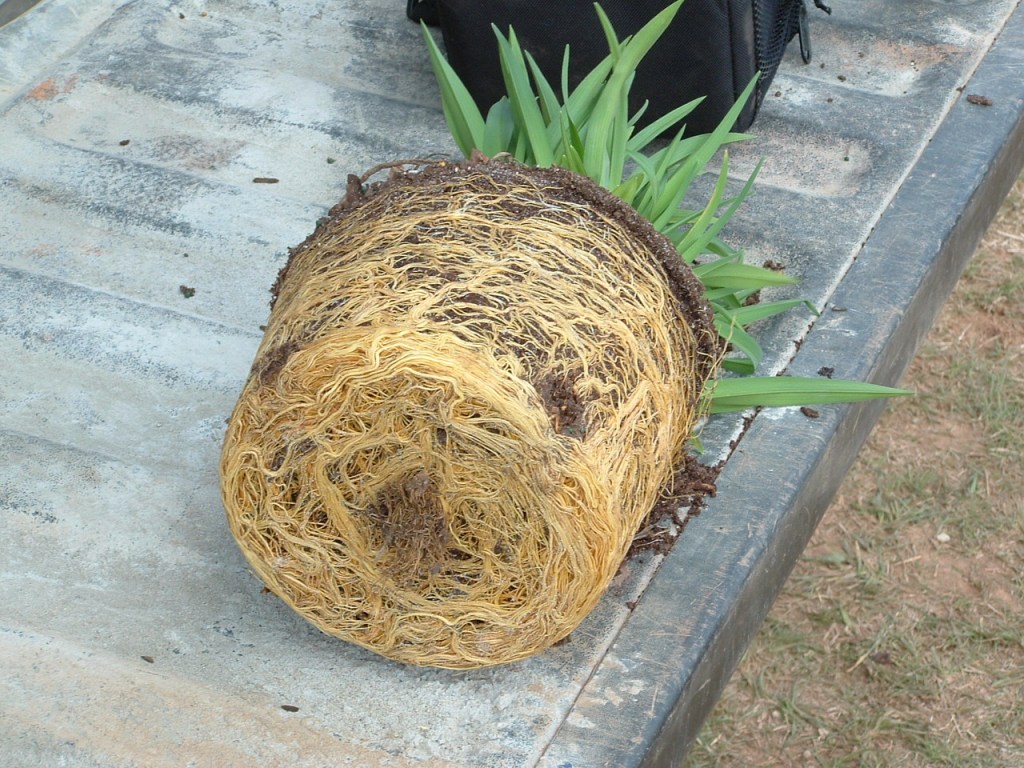
Be sure to break apart the roots on the bottom and on the sides. If they are really tough, you can even use a knife to cut through them a bit. You really want to open up the roots so they can reach out into the soil more easily. (Don’t worry, you aren’t hurting it as much as you think you are.)
*** A pro-tip for when you are planting them into the ground, sprinkling some compost or organic fertilizer into the bottom of the hole and within the fill dirt will help give your plants a boost during the stressful transplanting stage. ***
10. Once all of your plants are firmly packed in the ground, it is time to water and protect the soil from the elements. Be sure to water your plants thoroughly once they have been transplanted. This is a very important step. Next, select your mulch of choice and be sure to put about a 2-3 inch layer to suppress the weeds and to limit the water evaporation. Then give everything another good watering. Here is a great article on the many different types of mulches to choose from. My recommendation is to use something that will decompose over time so that way it can continually add to the organic matter within the soil and will feed the worms, the fungi and the soil life within there.
11. From this point forward, you will be maintaining your garden. Be sure to keep it watered, but don’t over water it. Be sure to pull any weeds you may find pop up. Be sure to deadhead and prune any dead flowers or stems, as that will promote more flower and plant production. Be sure to keep an eye on any insect damage or diseases so you can catch it early. And if you are growing food, be sure to harvest the fruit at the proper time!
12. And finally, don’t forget to stop and smell the roses…or lillies…or honeysuckle…or lavender…what ever you have growing- stop and enjoy it. Bask in all the hard work and love you put into your garden. Admire the beautiful creations that are growing on your property. Connect back to nature and never loose sight of your “why.”
Of course, there is so much more that can be said about gardening. But I wanted to give you a place to start. A simple way to begin your journey into the gardening world. If you would like more in-depth information on gardening such as soil health, plant-specific care, annuals vs. perennials, composting and more, be sure to subscribe for more content!
Want to book an appointment with me for a free consultation? be sure to fill out the form that is found here.
If you would like to help support the Ecoculture movement, please check out our gift shop and donation page! (10% of all proceeds are donated to local churches.)
Thank you for your support, and I wish you many blessings on your gardening journey!
God Bless.

One thought on “What you Need AND Need to Know to Get Your Garden Started”